


About This Snippet
We’ve all seen it before, the notorious “404 Not Found”, or perhaps even the “401 Authorization Required” or “403 Forbidden” error pages.
These website error pages or responses, which are actually responses from the underlying HTTP server (that is, web server), almost never look good out-of-the-box relative to the rest of the appearance of a website. Wouldn’t it be nice to freshen these up a bit, so the error pages better match the branding and look-and-feel of your website? Well, here is the snippet to do so…
The Snippet
There are multiple ways to intercept this error and serve up a custom response depending on the HTTP server (E.g. Apache HTTP Server, Nginx, IIS, etc.). For the purpose of this article, we will focus on Apache HTTP Server with its ErrorDocument directive.
(Note: The following snippet provided is in context to those websites running under Apache 2.x, where the “AllowOverride FileInfo” directive has been given for the virtual host, enabling the use of .htaccess files within your web root. This is most often enabled already in shared hosting environments. If you are self-hosting, you may require some additional setup.)
In order to perform this action you will need:
1 ) A file with HTML content that will hold your custom response. For this example snippet create a file named 404.html. Within this file create the custom HTML content you wish to be presented when a “404 Not Found” response is given from Apache HTTP Server and place it in the location:
“<web-root>/errors” of your web host. An example might be “public_html/errors”.
2 ) The ability to add/edit the .htaccess file typically found in your web root folder. An example might be “public_html/.htaccess”.
Once steps 1 and 2 are completed above, open your .htaccess file and simply add the following line:ErrorDocument 404 /errors/404.html
That’s it! In your web browser go to a location that does not exist on your site and you should see rendered a page that is the contents of your 404.html. Click here for an example of this setup on www.snippetninja.com. (NOTE: a fake URL has been linked to in this example link above to trigger the “404 Not Found” error response using a custom page).
Geeking Out
Other status codes can have custom responses as well. By simply replacing the number “404” in the example above to a “401” or “403”, and then adding a custom page of your choosing (E.g. 401.html or 403.html), you can then provide a separately handled presentation for that HTTP error response.
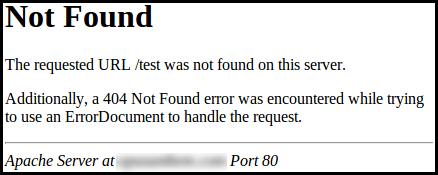
How does this all work? When someone makes a request from your website with a web browser, the HTTP server that hosts your website looks for that resource (E.g. /some-web-page.php). If that resource is found, it returns the contents of that resource back to the web browser along with some other useful HTTP header information such as content-type and the status code (just to mention a few). If successful, the status code is returned with the message “Status: 200 OK”. However, when a resource is not found, the status code “Status: 404 Not Found” is returned and the HTTP server pulls its default “canned” page for this event, which looks something like this:
A response back with a page that appears this way typically does not look good visually in relation to the look-and-feel of a website, and as result, breaks the visual design continuity. The good news is most all HTTP servers provide a way to override the “canned” default and alternately serve up a user-defined custom page, putting control back into your hands over the visual presentation of your website!
SnippetNinja provides articles with snippets on various topics. These articles are written to facilitate education and learning in technology. Click here to read more about SnippetNinja and the content provided on this site.
Copyright © 2024-2025 SnippetNinja.